Yes, Windows 11 also includes an option to upload files to cloud storage via OneDrive, but it’s limited to only 5GB of storage free storage space. Another option to backup Windows 11 files is by using third-party backup & restore apps. Compared to third-party backup apps, the File History of Windows 11 is easier to set up and use. Once you have configured Windows 11’s File History, you need to connect your USB drive to your computer, and Windows 11 will automatically backup the file to that drive. You can even schedule a backup feature to run on a schedule.
Steps to Use Windows’s File History To Back Up Your Windows 11 Data
So, if you are interested in enabling and using Windows’ File History to backup your data, you are reading the right guide. This article will share a step-by-step guide on using Windows File History to back up your data.
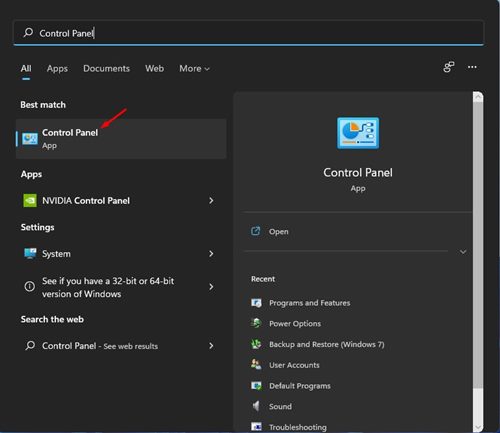
First of all, click on the Windows 11 Start and type in Control Panel. Then, open Control Panel from the list.
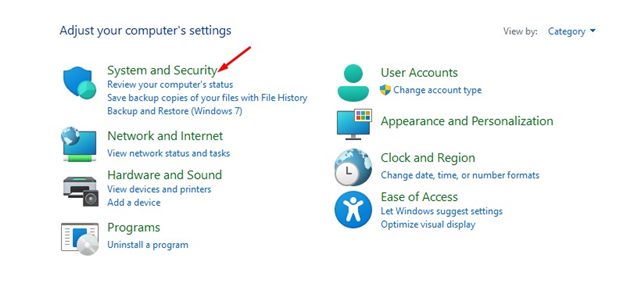
On the Control Panel, click on the System and Security option as shown below.
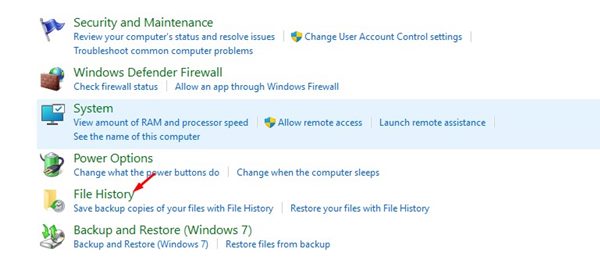
On the next page, select the File History option.
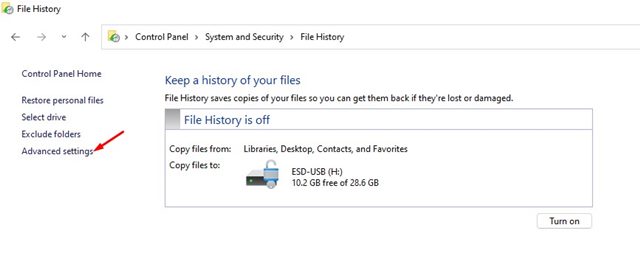
Now connect an external drive and refresh the Window. Next, click on the Advanced Settings on the left sidebar.
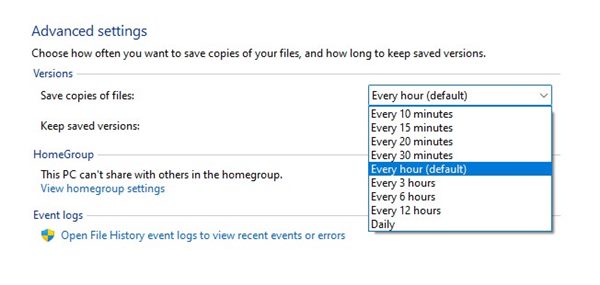
You need to set a schedule to run the File History on the next screen. The default is Every Hour; you can change the time frame from the drop-down menu.
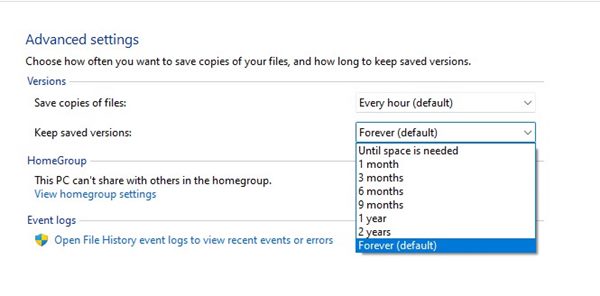
Next, select the dropdown for Keep saved versions and change it as per your preference.
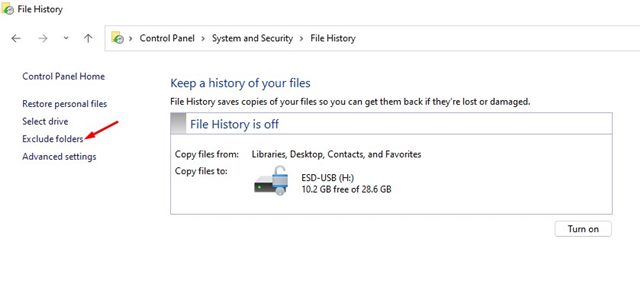
If you want to exclude any folder, click on the Exclude folders option and add the folder you don’t want to backup.
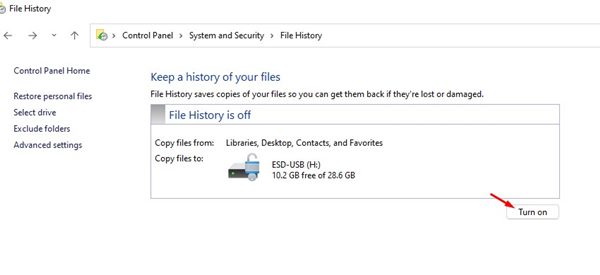
Now, you need to return back to the main File History screen and click on the Turn on Button to enable the feature.
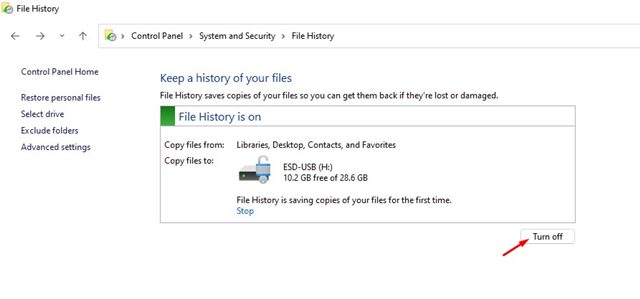
To disable the File History, click on the Turn off button as shown below.
Important: The File History will only back up files from Libraries, Contacts, Desktop, and Favorites folders. Setting up File History on Windows 11 is pretty straightforward. You can rely on this feature to backup your Windows 11 to an external drive. I hope this article helped you! Please share it with your friends also. If you have any doubts related to this, let us know in the comment box below.
Δ