Looking back, we will find that the latest Windows 10 operating system has improved much regarding maintenance. The operating system offers many troubleshooting tools that help fix various problems. So, in this article, we will talk about the little-known tool known as Automatic Maintenance. Automatic Maintenance is a built-in Windows 10 operating system tool that helps users keep their computers healthy and well-optimized. So, let’s explore more about Windows 10 Automatica Maintenance.
What is Automatic Maintenance in Windows 10?
As we have mentioned early, Automatic Maintenance is a built-in tool in Windows 10 that can help users in multiple ways. It’s a system maintenance tool that runs in the background. The tool performs many things, like it fixes the error, defrags your hard drive, running other optimization services, etc.
The feature automatically runs some related tasks daily at 2 am by default. It works in the background, but only if turned on and sitting idle. So, the Automatic Maintenance feature will run some tasks like system app updates, malware scans, diagnostics, defragmentation, etc., at the given period. So, if you turn on your computer after 2 AM or if your computer is not idle, then Automatic Maintenance will run the tasks on the next schedule. So, in short, Automatic Maintenance in Windows 10 does everything that can improve the overall performance of your device. It combines and runs all major maintenance without affecting performance or power consumption. So, it’s a useful tool; everyone should know how to use it.
Steps To Use Automatic Maintenance On Windows 10
It’s worth noting that the Automatic Maintenance in Windows 10 is turned on by default and works automatically. However, you can tweak a few Automatic Maintenance settings to make it more useful. So, here’s how you can use and control Automatic Maintenance in Windows 10.
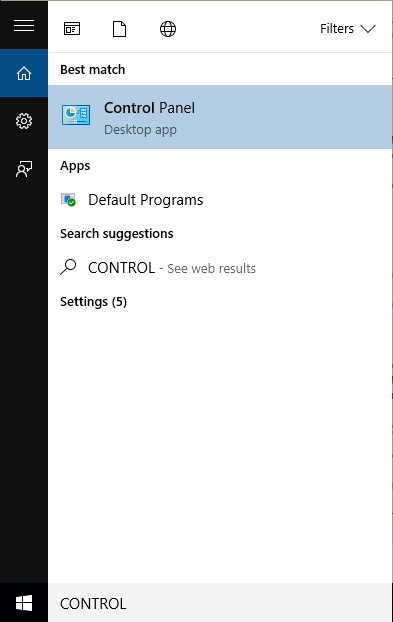
First, open Control Panel on your Windows 10 computer.
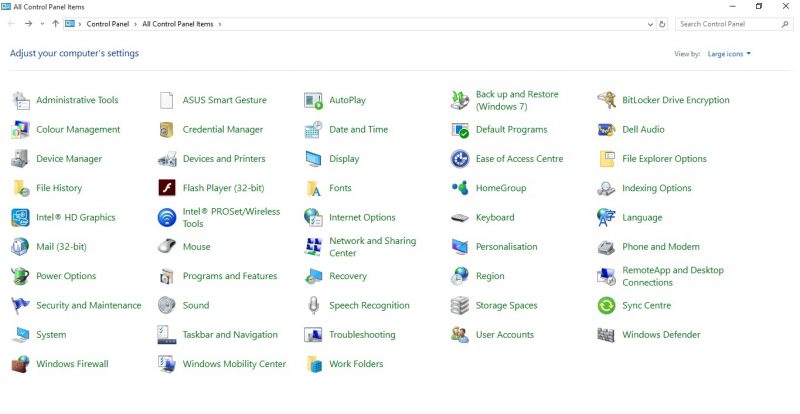
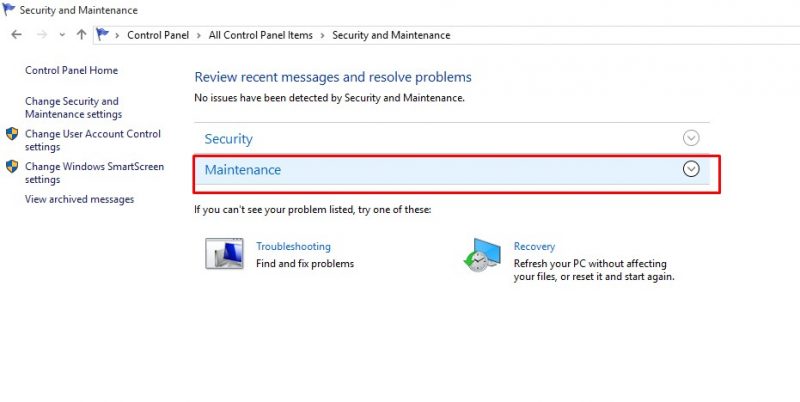
Now, on the control panel, select System and Security or Security and Maintenance.
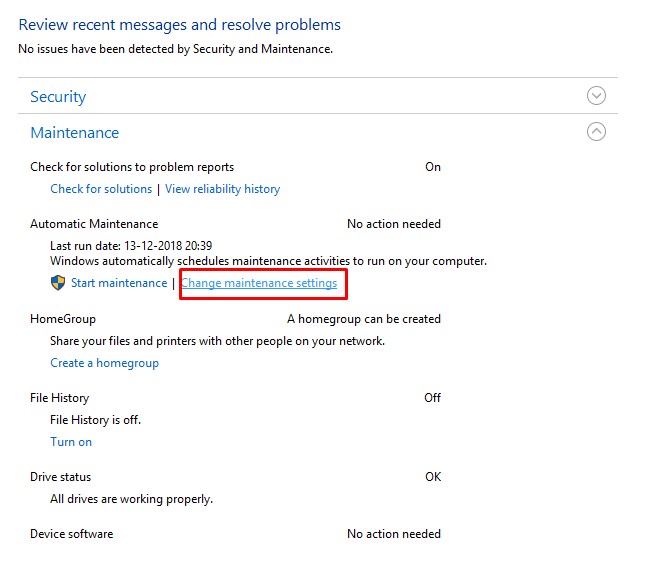
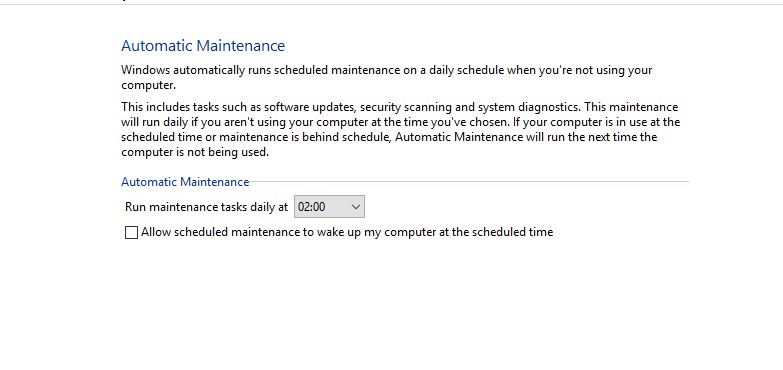
Now, under Automatic Maintenance, click on Change Maintenance Settings.
Next, click on the drop-down menu under the Run Maintenance tasks daily and then set the time you want your system to run the optimization service.
That’s it! Now click on the ‘Ok’ button. Now your computer will perform all maintenance and optimization at the time you have set.
How To Disable Automatic Maintenance?
Since Automatic Maintenance is a useful feature, Windows 10 doesn’t provide us an option to disable the feature. However, if you still wish to disable the Automatic Maintenance on Windows 10, you can try the method below. We need to play with the registry file to disable Automatic Maintenance. Since editing Registry is risky, we recommend you create a full backup of your PC before following the method.
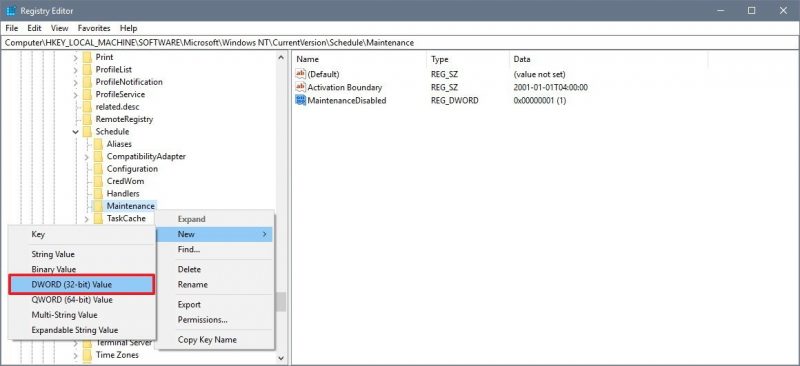
Open the RUN command box and then type in regedit. This will open the Registry file. You need to locate the following:
Right-click on the Maintenance folder and select New > DWORD (32-bit) Value. Name the key Maintenance Disabled.
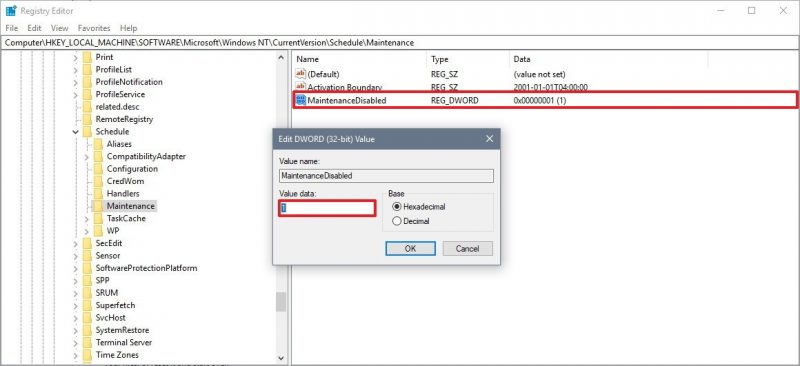
Double-click on the key you have just created, then set the value from 0 to 1. Click on ‘Ok’ and then restart your computer.
So, this is how you can disable Automatic Maintenance on Windows 10 computers. However, we don’t recommend you turn off this feature because it’s a crucial process that fixes many things on the computer. Also read: Windows 10 ISO Free Download Full Version So, this is all about Automatic Maintenance in Windows 10. The feature can help you to make your PC perform better. So, what do you think about this? Please share your opinion with us in the comment box below.
Δ
