This is called autofill entries and is available on every modern web browser for desktop & mobile. The Chrome browser can automatically fill your personal information wherever required, thanks to the autofill entries. Chrome saves the autofill entries locally on your device. While Chrome autofill is handy, you may want to delete or modify your autofill entries. There could be various reasons for adjusting the autofill entries on Chrome; maybe you have changed your location and want to update your new location, or perhaps you want to add a new payment method. Also read: How to Change or Reset Your Gmail Password
Steps to Add or Remove Google Chrome Autofill Entries
Whatever the reason, removing and adding autofill entries on the Google Chrome web browser is pretty easy. Below, we have shared a few easy steps to remove autofill entries in the Chrome browser. Let’s get started.
Types of Autofill data that you can modify
Well, Google Chrome offers you three different types of data that you can add or remove. You can modify the autofill entries for the following data on the Google Chrome browser.
Passwords Addresses Payment Methods
1) Remove & Add Autofill Password Entries on Chrome Browser
This method will let you remove and add autofill password entries on the Chrome web browser. Here’s how you can modify Chrome autofill settings to remove Chrome autofill email addresses & passwords.
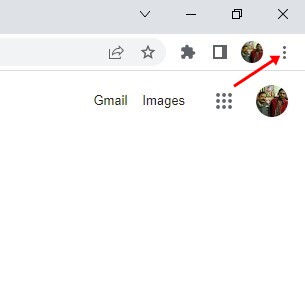
Open the Google Chrome browser and click on the three dots in the top-right corner.
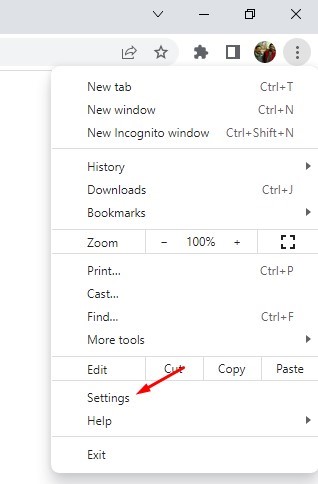
From the list of options, click on Settings.
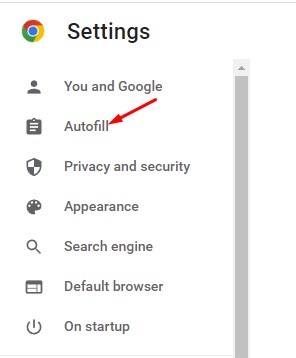
On the Settings page, click on the Autofill option on the left sidebar.
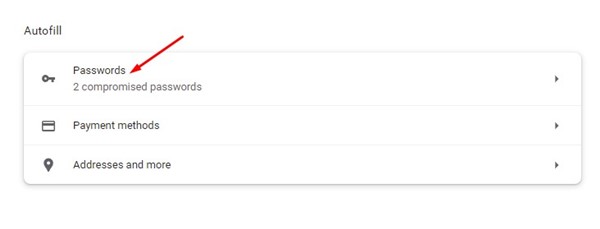
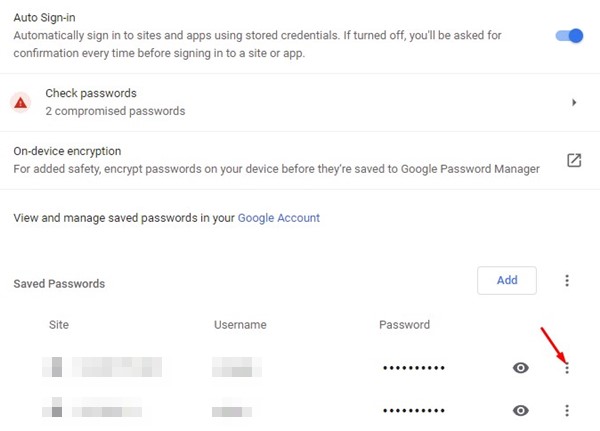
On the right, click on the Passwords.
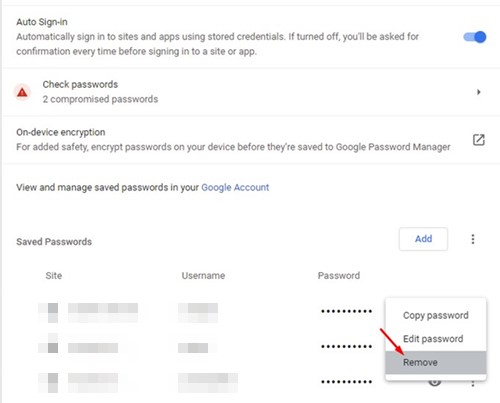
Now, you will find all your saved passwoClickclick on the three dots beside the pas to remove autofill password entries word.
From the list of options that appears, click on the Remove button.
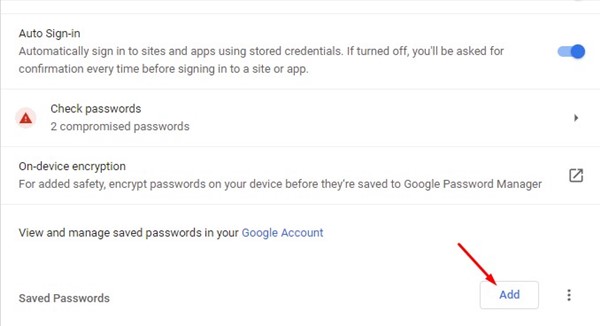
To add a new autofill password entry, click on the Add button beside the Saved password.
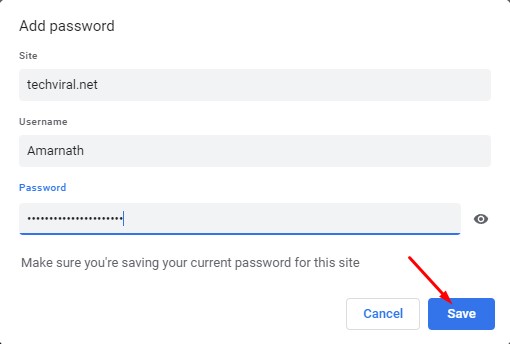
Now enter the site details, username & password. Once done, click on the Save button.
That’s it! This is how you can remove and add autofill password entries in the Chrome browser.
2) Remove & Add Autofill Addresses Entries in Chrome
This method will let you remove and add autofill address entries in the Chrome browser. Follow some of the simple steps we have shared below.
Open the Google Chrome browser and click on the three dots in the top-right corner.
From the list of options, click on Settings.
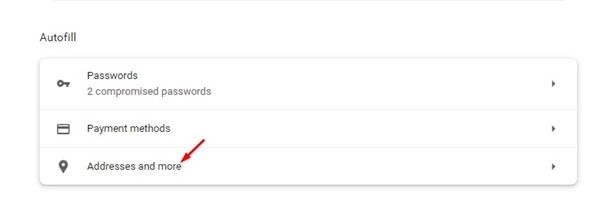
On the Settings page, click on the Autofill option on the left sidebar.
On the right, click on the Addresses and more.
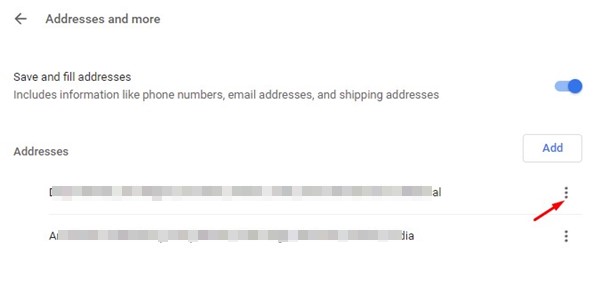
5. To remove an address, click on the three dots beside the saved address.
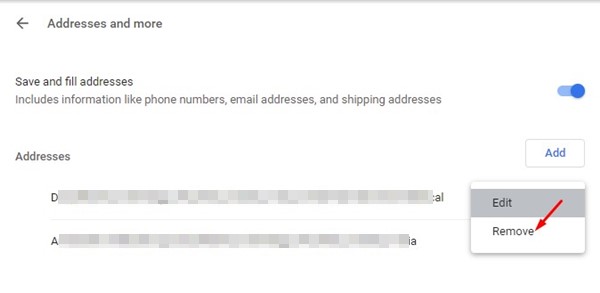
From the list of options that appears, click on the Remove button.
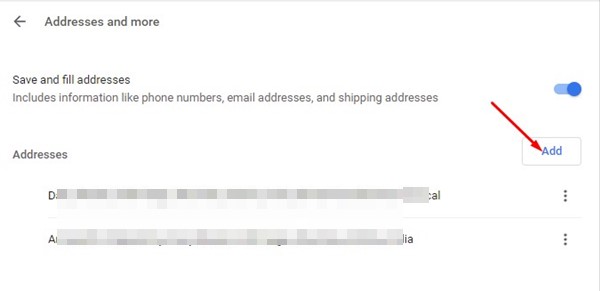
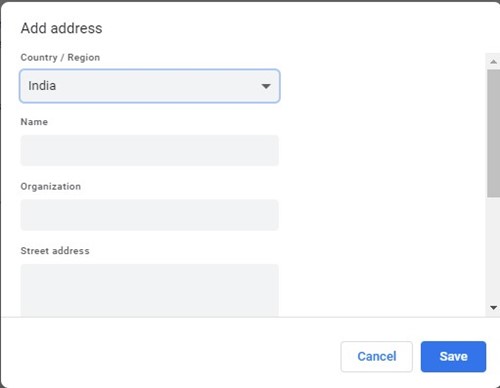
To add a new address, click on the Add button beside the Addresses.
On the Add address prompt, enter your address and click on the Save button.
That’s it! This is how you can add or remove autofill address entries in the Chrome browser.
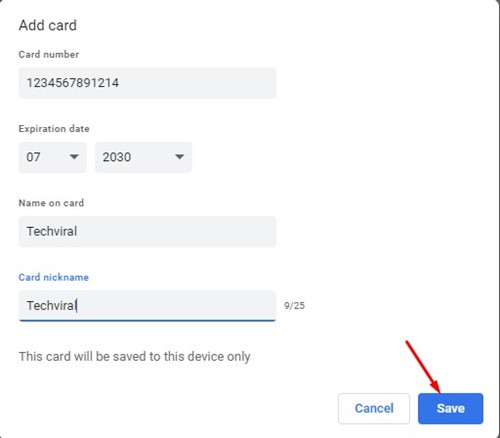
3) Remove & Add Autofill Payment Entries in Chrome
Just like the saved passwords & addresses entries, you can remove & add autofill payment entries. For that, follow some of the simple steps we have shared below.
Open the Google Chrome browser and click on the three dots in the top-right corner.
From the list of options, click on Settings.
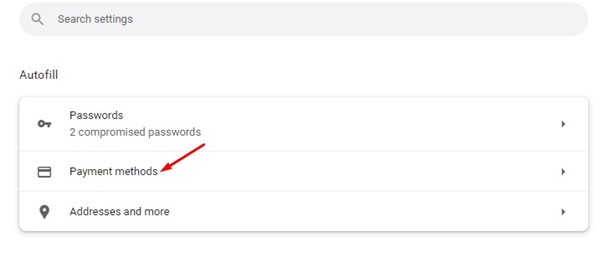
On the Settings page, click on the Autofill option on the left sidebar.
On the right, click on the Payment methods.
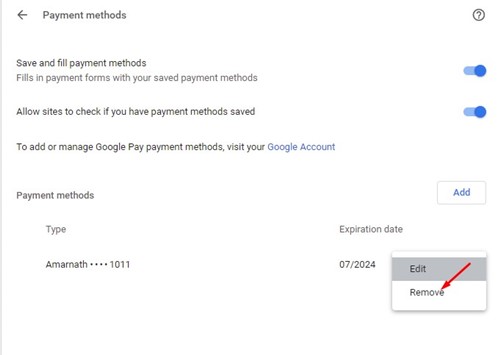
To remove a payment method, click on the three dots beside the payment method and select Remove.
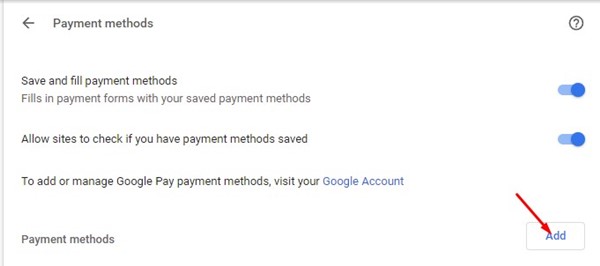
If you want to add a new payment method, click on the Add button beside the Payment methods option.
Now, fill in the card details and click on the Save button.
That’s it! This is how you can remove and add autofill payment entries in the Chrome web browser. Also read: How to Recover Deleted Emails in Gmail So, that’s all about how to add and remove autofill entries in the Chrome web browser. You can access the Autofill settings and modify the three options if you have saved the wrong information in it. If you need more help, let us know in the comment box below.
Δ